Documentation
Documentation
Register Your App
Register your application with the IDP before running the XAA flow. Registration gives you the client credentials used in Steps 1, 2, and 3.
Go to: Test Your Requesting App from the home page
Identity prompt
The first time you visit, you're asked for an email address. There is no account: no passwords, no verification. It is a namespacing key: every app you register is scoped to this email, and your list is only visible when you return with the same address.
Use any address that identifies you (e.g. dev@yourcompany.com or a project-specific address). If you share an address with a colleague, you share a client list.
Registration form
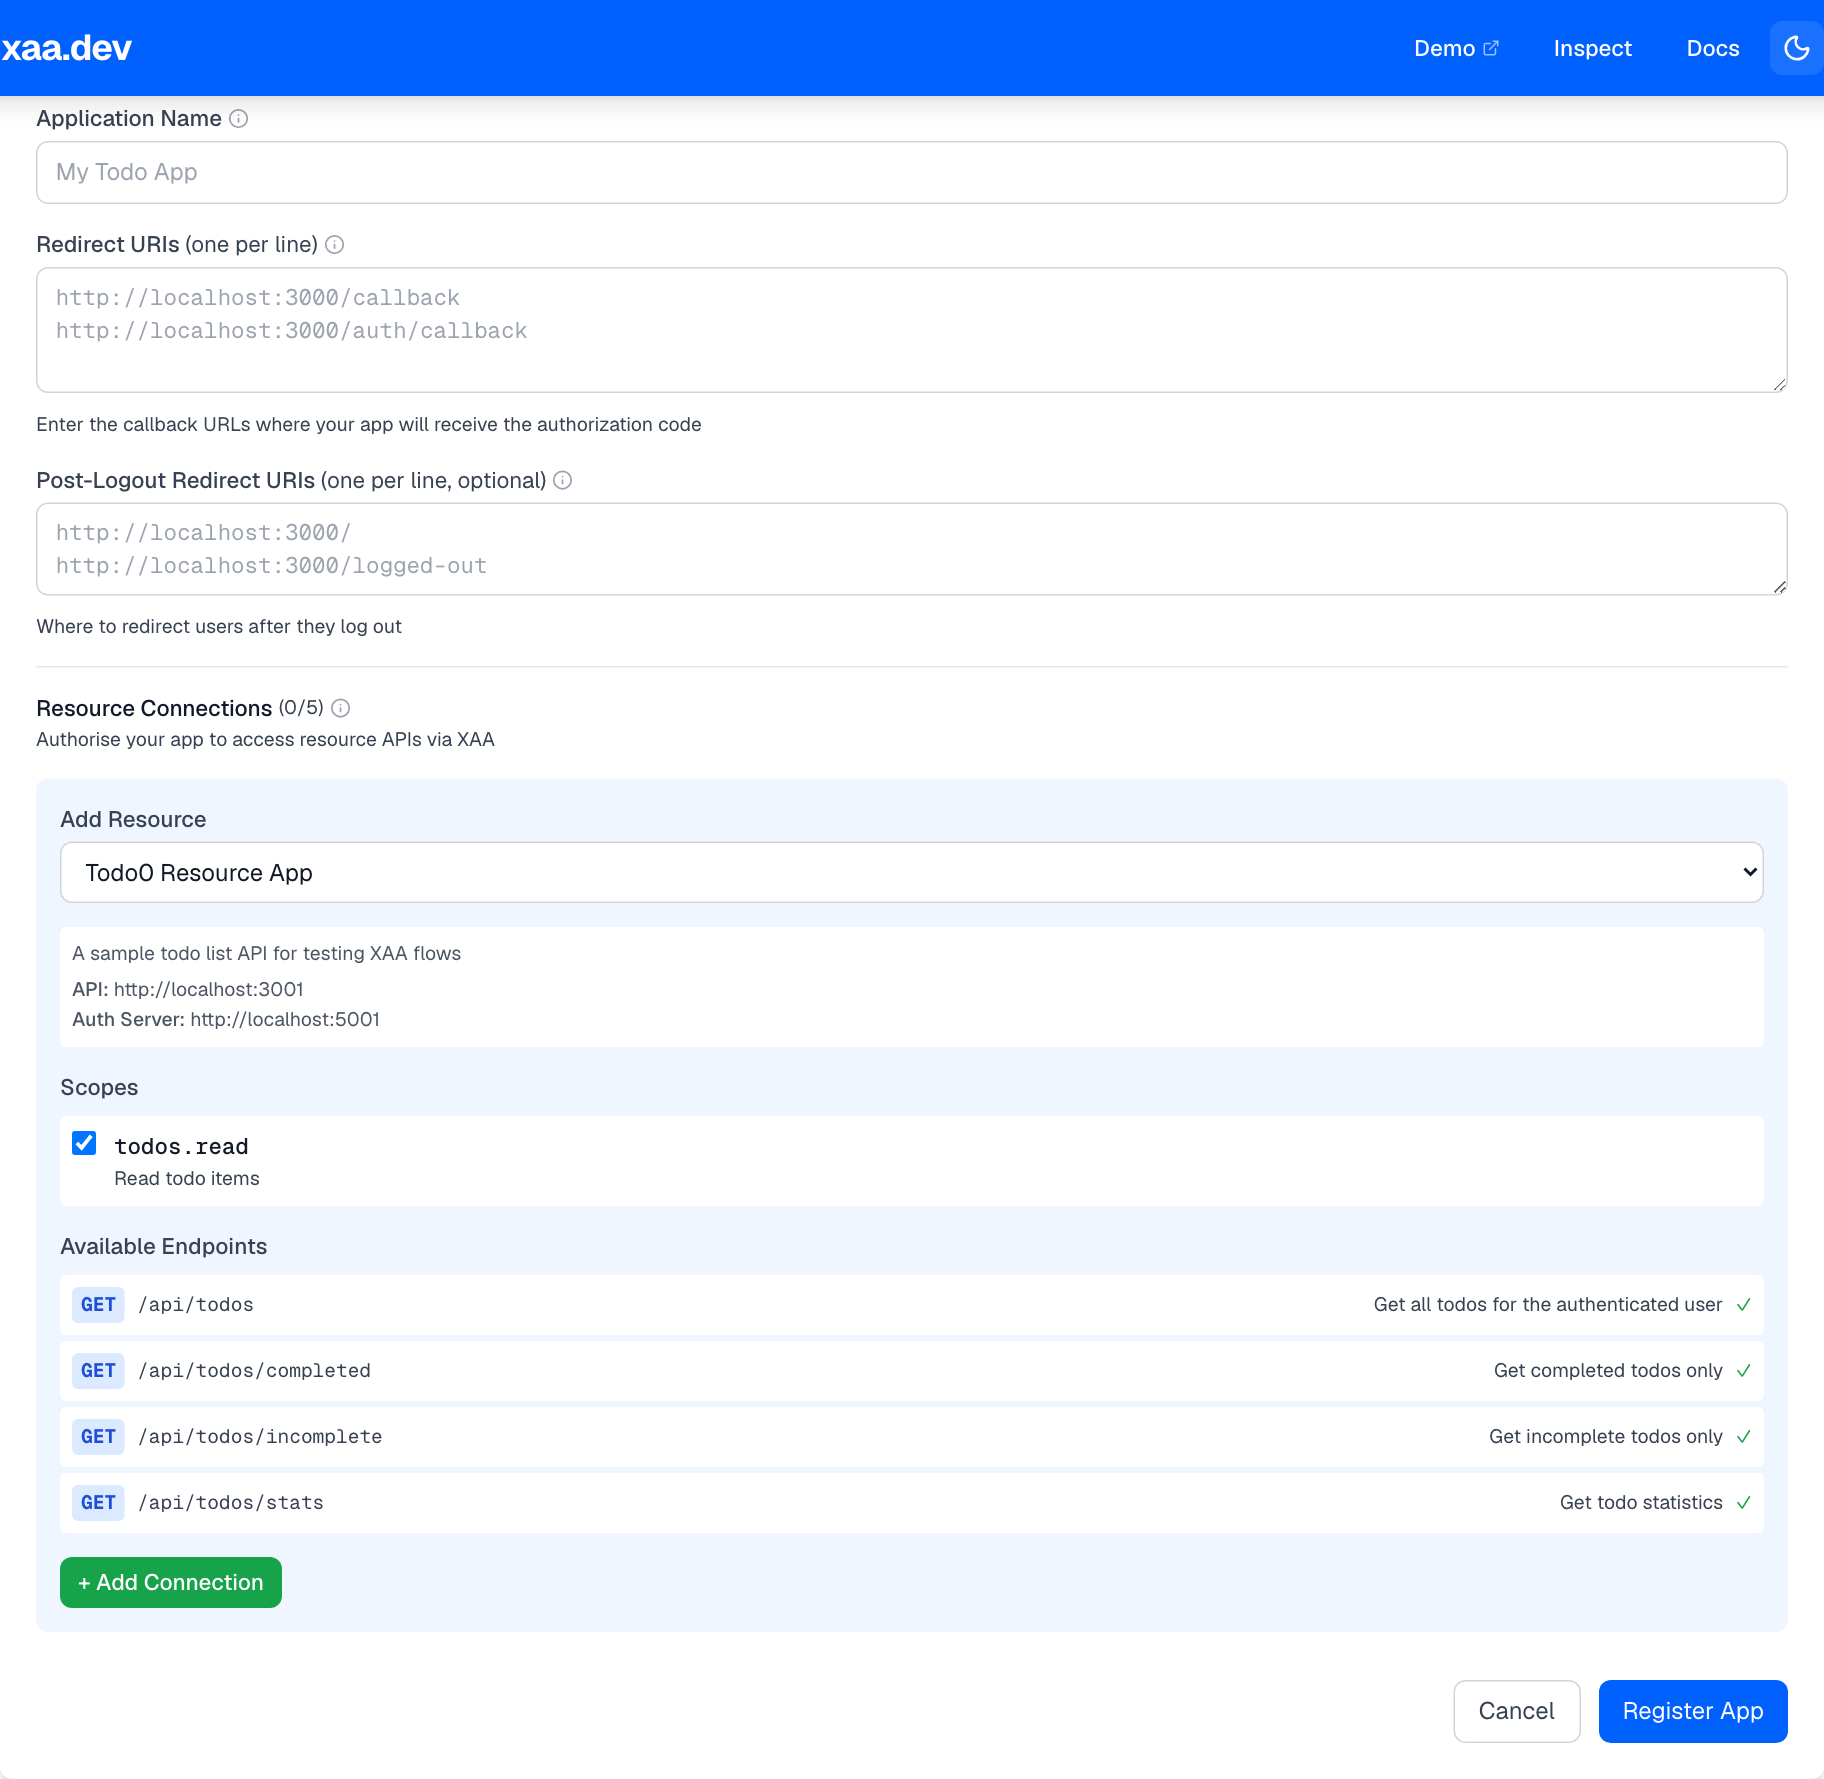
Click + Register New App to open the form.
Application Name
A label for your own reference. It appears in your client list and in IDP system logs. Use something that identifies the app or environment (e.g. My Todo Client - Local Dev).
Redirect URIs
One URL per line. These are the callback URLs your OIDC library will redirect to after a successful login. Each URI must match exactly, including scheme, host, port, and path.
Post-Logout Redirect URIs (optional)
Where to send users after they log out. If omitted, the IDP uses its default post-logout page.
Connect to Resource
Select a resource server from the dropdown and choose the OAuth scopes your application needs.
This creates a resource connection, an IDP-enforced policy that says: this client may request ID-JAGs targeting this resource with these scopes, and nothing else. Any token exchange request for a different resource or scope will be rejected at Step 2 with invalid_target or invalid_scope.
When you pick a resource, all its available scopes are pre-selected. Deselect any scopes your app doesn't need. Apply the principle of least privilege.
What registration creates
Submitting the form creates two OAuth clients and shows their credentials in a modal.
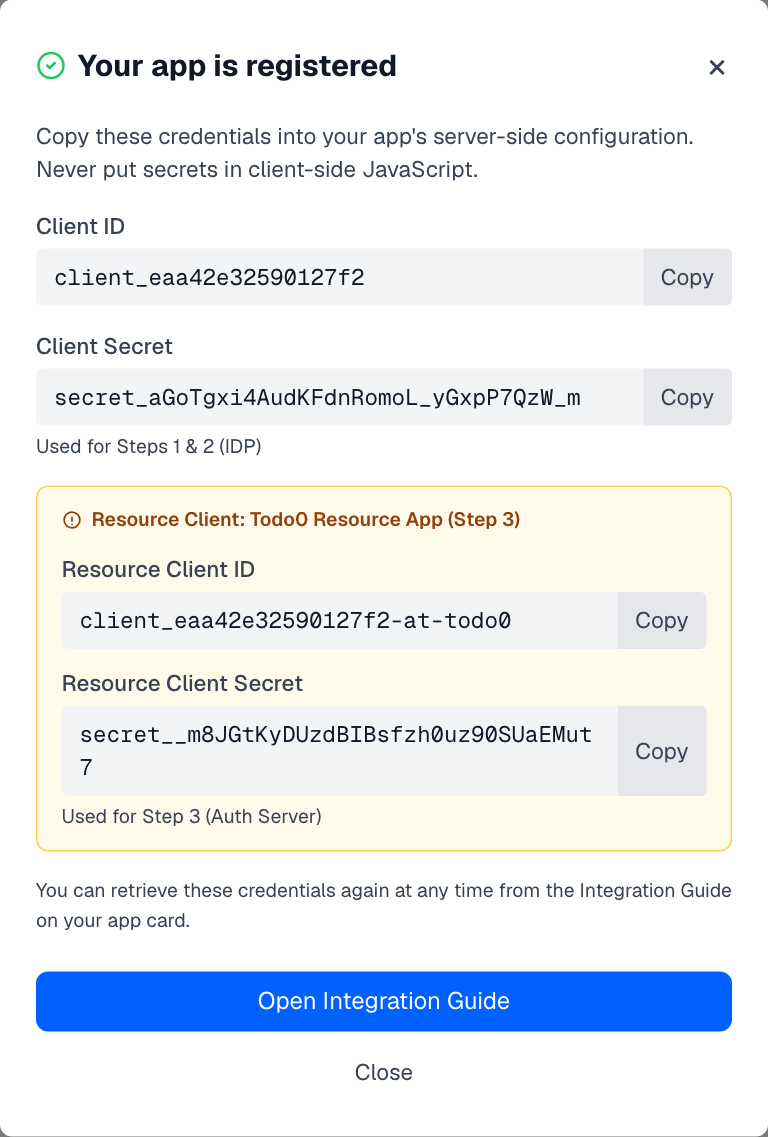
The modal shows all credentials immediately after registration. You can also reveal them at any time from your client card in the list below. Click the Reveal button next to Client Secret, or open the Integration Guide on the card and use the eye icon on any secret row.
Main client
Used in Steps 1 and 2.
| Credential | Used in |
|---|---|
client_id | Authorization URL (Step 1), token exchange (Step 2) |
client_secret | Client authentication in Steps 1 and 2 |
Resource client
Automatically provisioned at the Authorization Server when you add a resource connection. Used in Step 3.
| Credential | Used in |
|---|---|
resource_client_id | Client authentication in the JWT Bearer grant (Step 3) |
resource_client_secret | Client authentication in the JWT Bearer grant (Step 3) |
The resource client ID follows the pattern {client_id}-at-{resource_id} (e.g. client_abc123-at-todo0). It represents your application's identity at the resource's Authorization Server, separate from its identity at the IDP.
Why two clients?
The XAA flow crosses a trust boundary at Step 3: you go from the IDP's Authorization Server to the resource's Authorization Server. Each server needs its own set of client credentials because they are separate trust domains.
Using the main client credentials in Step 3 will result in invalid_client.
Multiple clients
You can register as many clients as you need. Common reasons:
- Different redirect URIs: separate clients for development, staging, and production
- Different resource connections: a client for the Todo API and another for the MCP server
- Different scope sets: a read-only client and a read-write client
Each registration creates independent credentials. Deleting a client immediately revokes its credentials. Any in-flight tokens based on that client will fail at their next validation.
Managing your clients
Your registered clients appear in the list below the form. You can delete any non-default client by clicking Delete on its card.
The Default badge marks the pre-built agent0 client used by the Demo. It cannot be deleted.
Next step
Once you have your credentials, put them in your app's config and proceed to Step 1: OIDC Login.
On this page